Dashing thro’ the snow, in a one-horse open… oh wait, it’s January already!
Yeah, yeah. This project is long overdue, but I thought I’d share it anyway instead of waiting another 11 months for it to be relevant.
So what is it?
Instead of having a plastic Christmas tree, this year I thought I’d make my own — out of plywood I had laying around, and with assorted LEDs fading in and out. The idea popped up in the middle of December, and back then I thought that I had plenty of time to finish the project by the 24th. I was wrong.
Coming up with a general design concept didn’t take long. Only a few minutes of gathering inspiration from Pinterest were enough for an idea to emerge in my head, and then a few moments later I had a 3D model in the works. It looked like this:

Ignore the base at the bottom. Eventually I decided to drop it and just glue the two triangular pieces together.
Getting them hands dirty
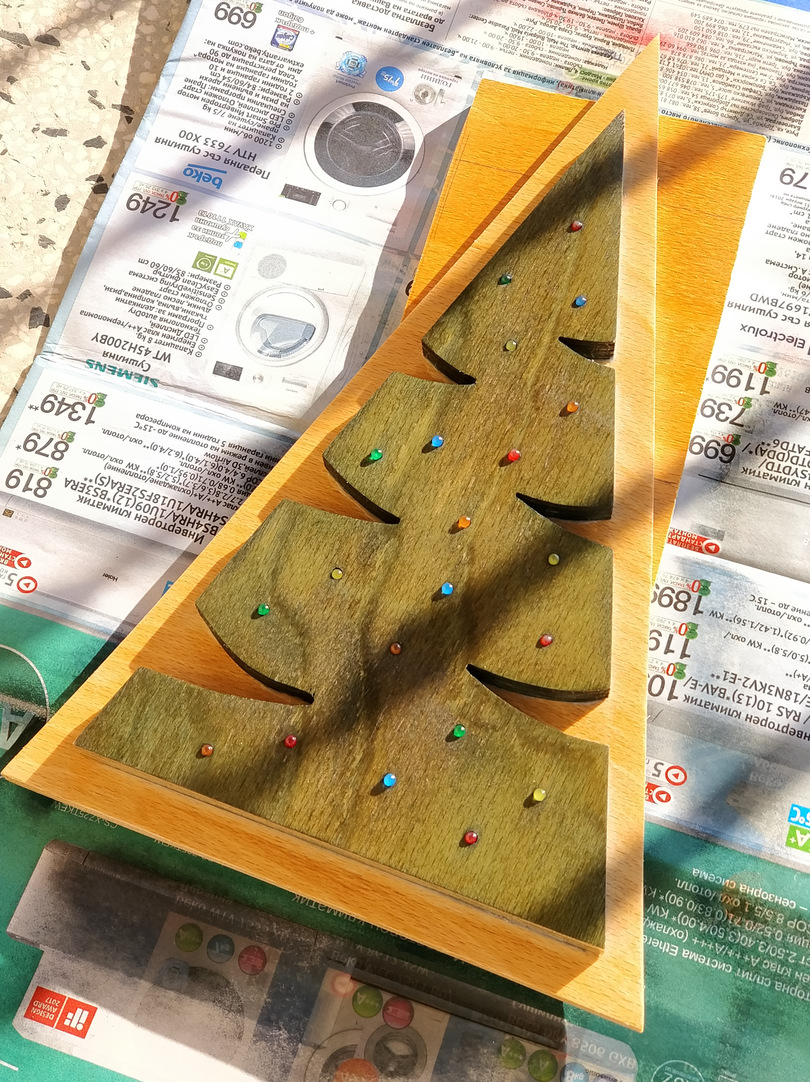
Cutting the plywood pieces with a jigsaw was an easy step. The trickiest part in the process was to be careful while cutting the slits on the sides of the tree. In the end, all came out pretty nice. A coat of green stain was enough to give it some color. Drilling 21 holes for the LEDs wasn’t difficult either.

Wiring the whole thing was trickier. I wanted two separate arrays of LEDs, and each of them had to have its own resistor. As a result, I ended up with this not-so-pretty web of wires. But it worked perfectly!
Note that I carved out some of the wood. This was necessary in order to fit all the wires — again, as I was working on the project I simply decided to glue the front and back together instead of having the base separating them.

Since all LEDs lit up, I glued the two pieces together and sprayed them with some laquer. Several coats produced a nice, shiny finish. This is what it looked like:
The electronics part, however, proved most difficult. In fact, it is the reason why the whole project (and the YouTube video around it) took about a month to complete. At first I was against using a microcontroller to make the LEDs light up. It felt like overkill, much like fishing with dynamite. So instead, I turned to a good-old 555 timer chip.
In theory, you can create a fading LED effect using a 555 timer. There’s an e-book called 50 555 timer circuits (a great resource, by the way) with a couple of schematics that do the trick. Only thing I added was a transistor to drive the LEDs. But in practice, I was driving 10 of them in parallel, and some colors faded in later than others due to differences in forward voltage. Other schematics I found online didn’t work at all.
Eventually I abandoned the 555 timer approach and bought an Arduino Uno. I had a working piece of code by the evening. It made the two arrays of LED gently fade in and out, but at different rates, creating a sense of randomness.
Of course, I didn’t use the entire Arduino board for my Christmas tree. I simply programmed the chip and placed it on a stripped down DIY Arduino board with a socket for the ATMEGA328.
Since the chip and LEDs required no more than 5 volts to operate, I chose to solder a microUSB port on the board and power the whole thing from a power bank.
Overall, this DIY Christmas tree was a tricky build, but it was worth the effort.
